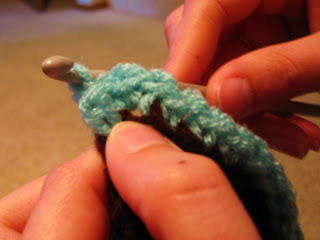
Here it is, crochet tutorial part 2, or how to finish your tutorial to make it an actual afghan.
First, prepare your coordinating color.
Insert your hook on the right corner of a short side, and wrap your 2nd color around it.
Pull it through and tie it. You are going to start by doing a single crochet. To review, this is how you do a single crochet:
Put your hook through where it just was. Put your yarn on top of your hook so you can pull it through.
Pull it through to make a loop.
Make a second loop, putting your hook through the next top "braided" part.
Hook your yarn and pull it through both loops. Continue by making a new loop and pulling your yarn through both loops until you get to the end, like so:
When you get to the corner, do 3 single crochet stitches through the last loop of the row to make a corner. Just make your second loop through the same stitch 3 times.
This is the cool part. You're going to push your hook through a space before your first stitch on the panel (x marks the spot, and the red shows you where my first stitch is).
Ok, I kind of messed up with this picture, but it won't ruin anything if you follow it. Ideally, you actually want to hook your yarn with the hook on top, whereas I have the hook on the bottom in this picture. It's better to hook it with the yarn under the hook.
Pull it through.
See how the right side of the loop is on the top of the hook? What you want to do now is pull your hook out from this loop, and put it back in so that the left side is on the top and the right side is on the underside of the hook.
See what I mean? This will make sure your design is "made" properly. If you don't do this step, it won't look right; it can actually look a bit tangled.
Now finish it off like it's a single crochet, hooking your yarn and pulling it through the 2 loops.
See how this makes a little triangle?
Repeat the process to make a second triangle.
For the next one, stick your hook through the space just before the third stitch in that row.
The next one should be just before the fourth stitch in that row. So the pattern is: 1, 1, 3, 4, 3, repeat. You'll do this all along the long sides of the panel, and a single crochet stitch on the short sides. Once you've gone around the panel once, you'll just do a single crochet stitch around the whole panel 2 more times.
To put all of your panels together (remember you should make 4 panels of 24 stitches across and 223 rows long, and one panel of 42 stitches across and 223 long) you'll put 2 of your panels with wrong sides (back side) together, and put your hook through the outside corner stitches of BOTH panels, and single crochet it, and continue until your get to the end and you have single crocheted your two panels together. As you might have guessed, you should put it together with the 24 stitch across panels on the outsides, and the 42 stitch panel in the middle.
When all of your panels are done and crocheted together, you'll single crochet around the whole afghan twice with your accent color, and then twice with your base color. You can add fringe on the short sides if you wish. There are several ways to do this, but what I have done in the past is taken 6 6-8 inch pieces of yarn, 3 of the base color and 3 of the accent. Put your hook through a loop, hook all 6 pieces of yarn, pull them through then pull the ends of them through the loop made with them, and pull tight.
If you do this you'll end up with a very warm blanket that is big enough for an adult.
That said, if you want to make one for a baby, you do the same stitches, but use baby yarn and an F hook (baby yarn is softer and thinner than regular yarn). You'll do 4 panels of 28 stitches across and 128 stitches long. To give you a visual, the one I've done ended up looking like this:
Unfortunately I don't have a picture of an adult-sized afghan. I have made one, but didn't take a picture of it, and I'm not done with the one I'm currently working on. I'll post that when it's done, probably in December haha.
Subscribe to:
Post Comments (Atom)


I don't know how you find the time.
ReplyDelete